Do you want to auto-populate fields in your WordPress forms? You can automatically use information like post types or products to create the options in form fields.
This makes forms easier to fill out, and it can also save a lot of time when you’re building them.
WPForms makes it easy to auto-fill form fields using dynamic field choices. We’ll show you how to set it up in this article.
Create Your WordPress Form Now
In This Article
How to Auto-Populate Fields in WordPress Forms
In this tutorial, we’re going to auto-populate WooCommerce products in a contact form.
Step 1: Install the WPForms Plugin
First, install and activate the WPForms plugin. Here’s a step-by-step guide on how to install a WordPress plugin if you need help.
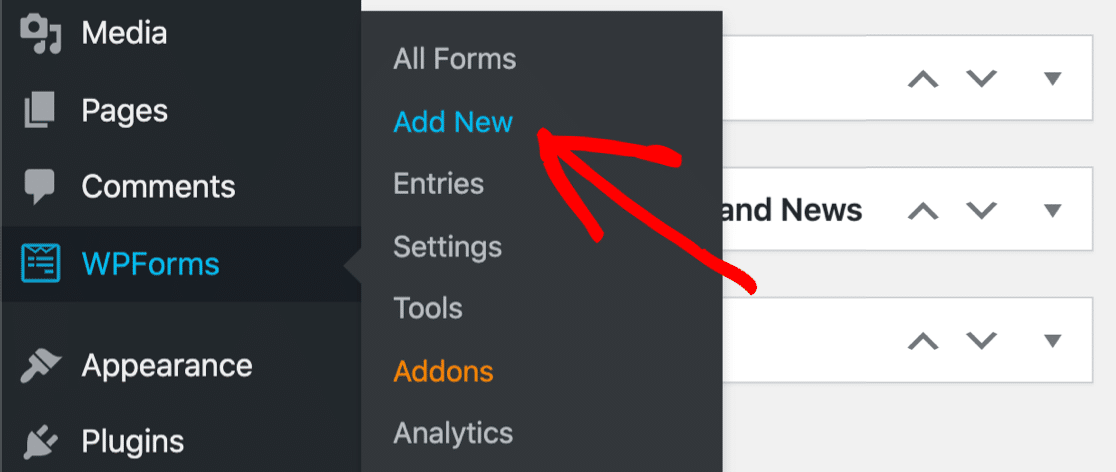
Now we’re going to add a new form. First, go to WPForms » Add New.
Next, let’s click the simple contact form template to start.
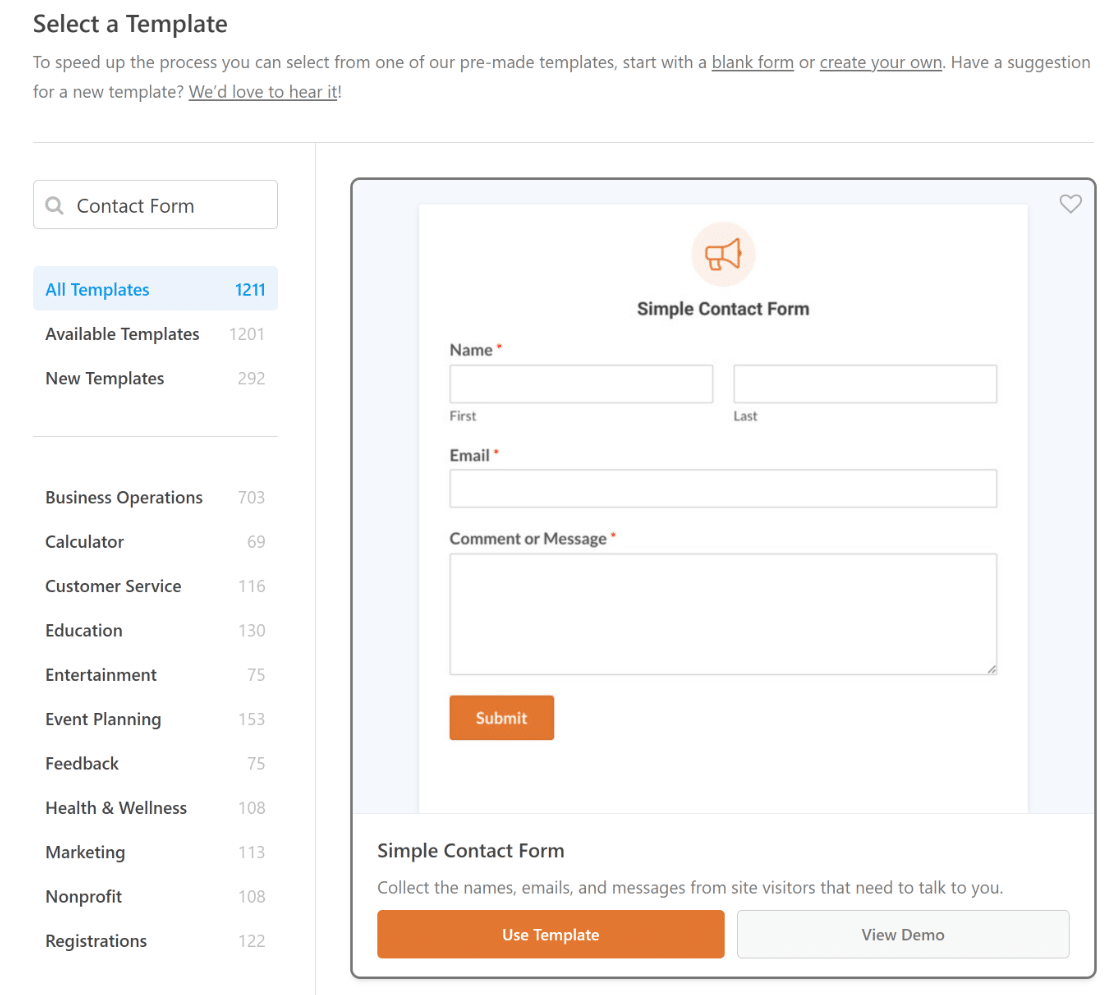
You’ll see the form builder open up in a fullscreen window. The simple contact form already has fields for:
- Name
- Comment or message
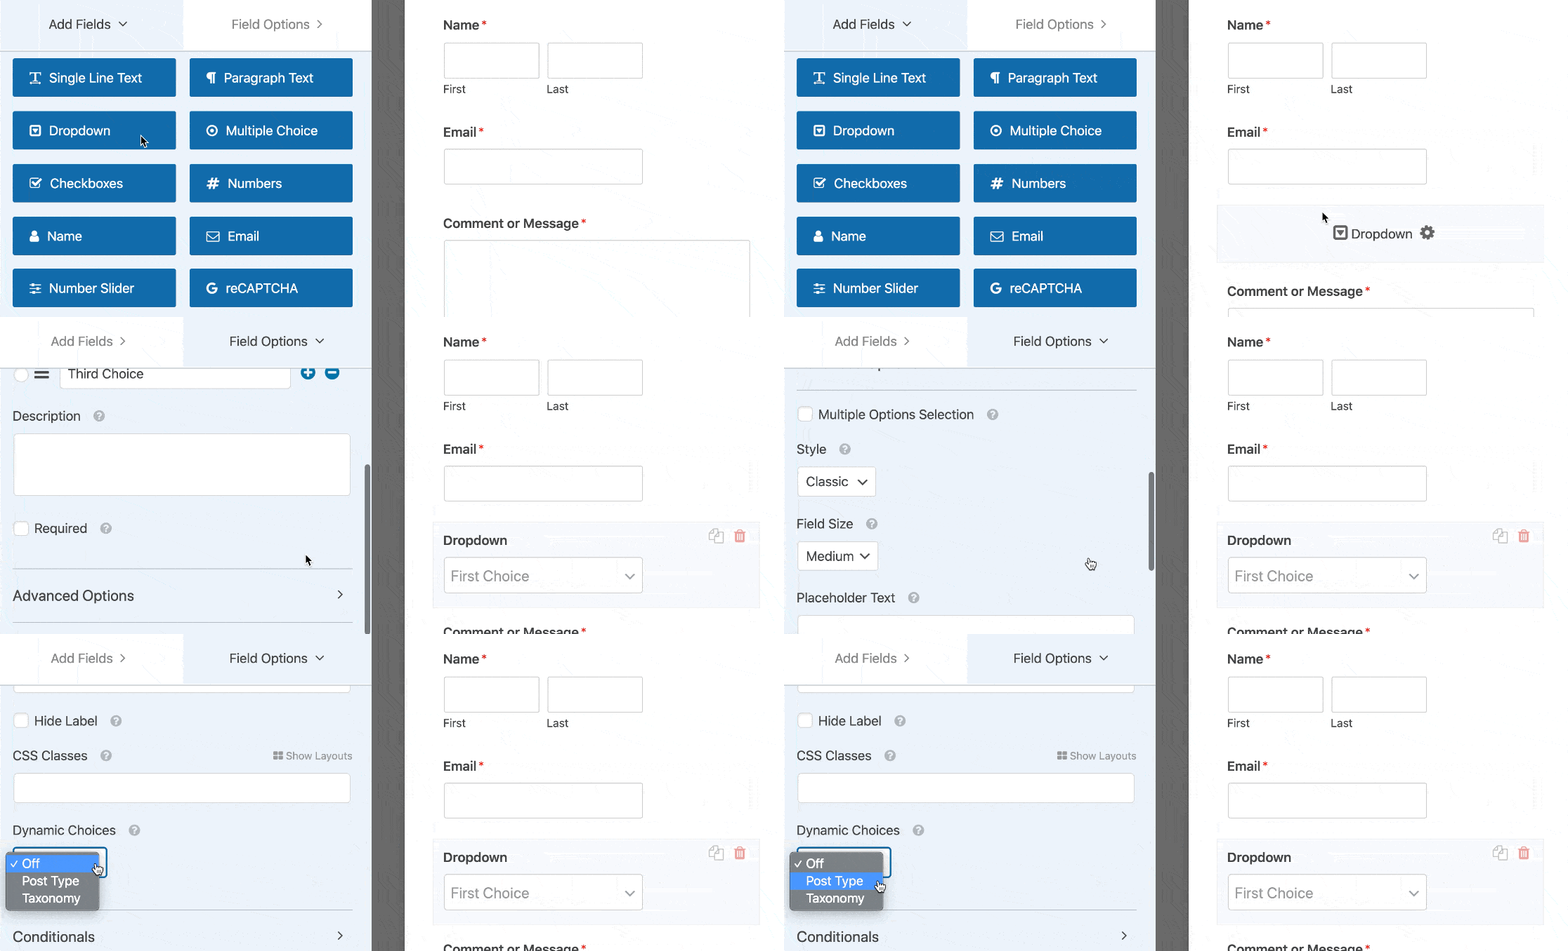
Let’s drag a dropdown field and then add auto-populated answer choices.
Click on the dropdown field and drag it over to the form preview on the right.
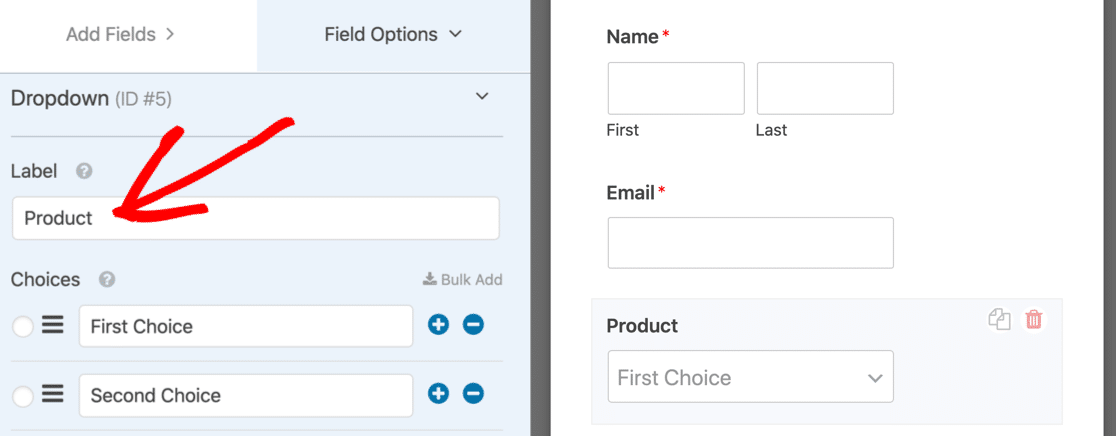
Next, click once on your dropdown to open up the settings on the left. Let’s edit the label here to describe the contents of the dropdown.
Now scroll down a little bit and expand Advanced Options. We’re going to choose 2 settings here to make the form easier to fill out:
- Style – We’re going to pick the Modern dropdown because it lets visitors search the list. This is a great way to make a really long dropdown a lot easier to use. If you want, you can easily create a multi-select dropdown so your visitors can pick more than 1 answer.
- Placeholder – It’s always a good idea to set a placeholder for a field. A placeholder looks like a default choice, but the visitor can’t select it. This is a great way to make sure the selection doesn’t default to the first answer in the list.
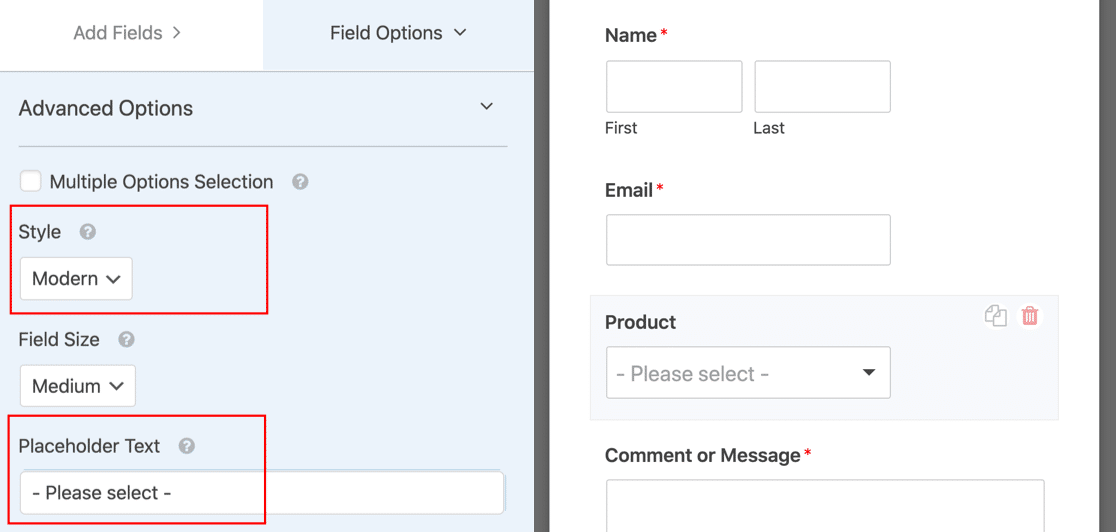
Now we’re ready to add a dynamic field choice to our new dropdown,
Step 2: Set Up Your Auto-Populated Field
Now we’re going to set up the options that will appear in the dropdown list.
With dynamic field choices, you don’t have to worry about typing all the answers in. WPForms will grab all of the options for you.
When you expand Advanced Options on your dropdown, you’ll see 2 choices:
- Post Type
- Taxonomy
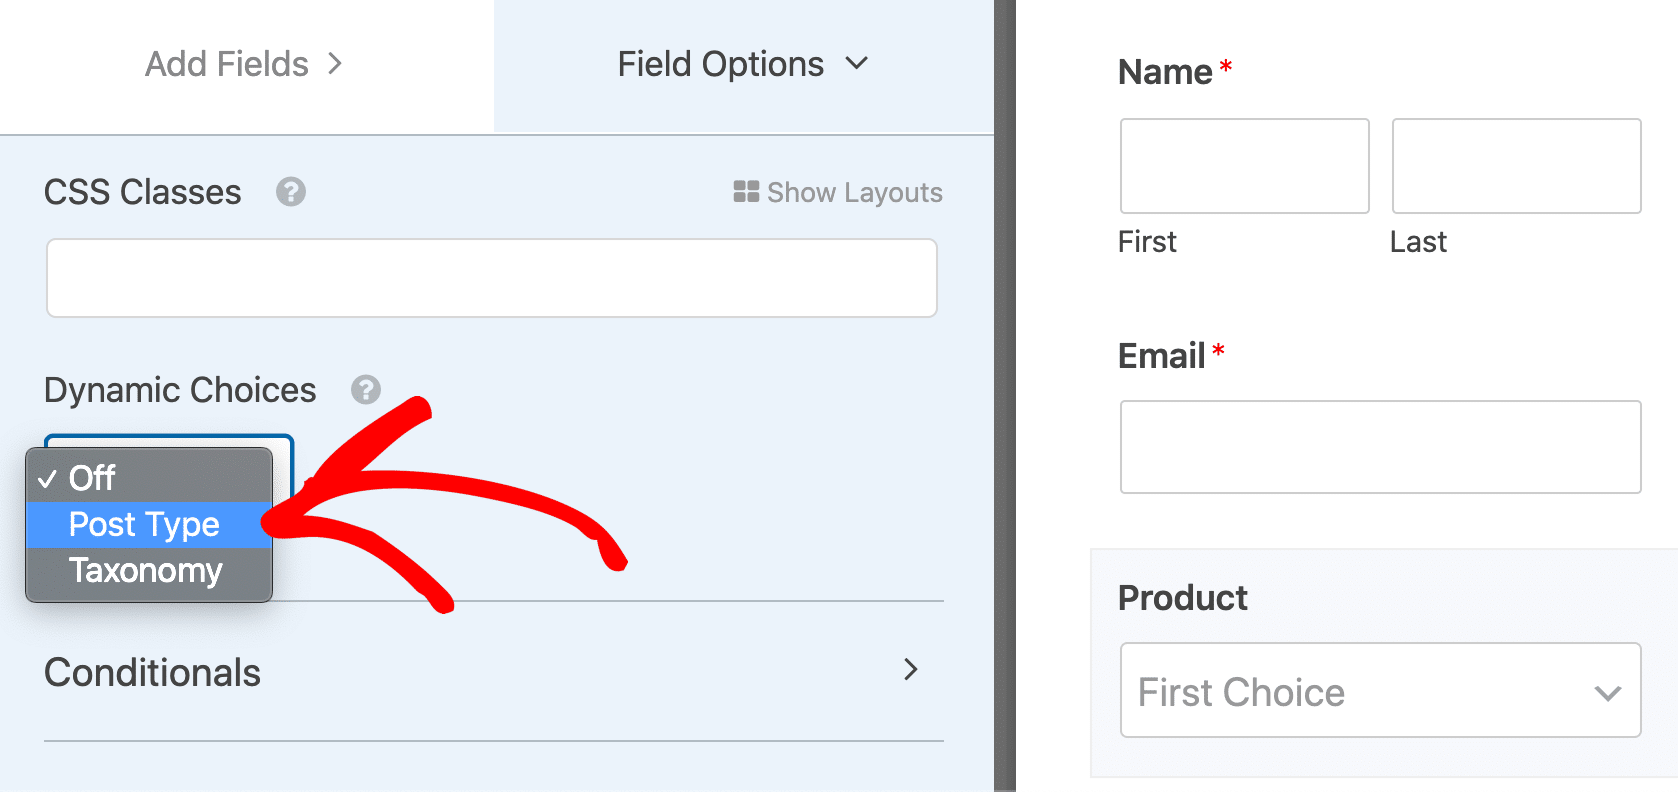
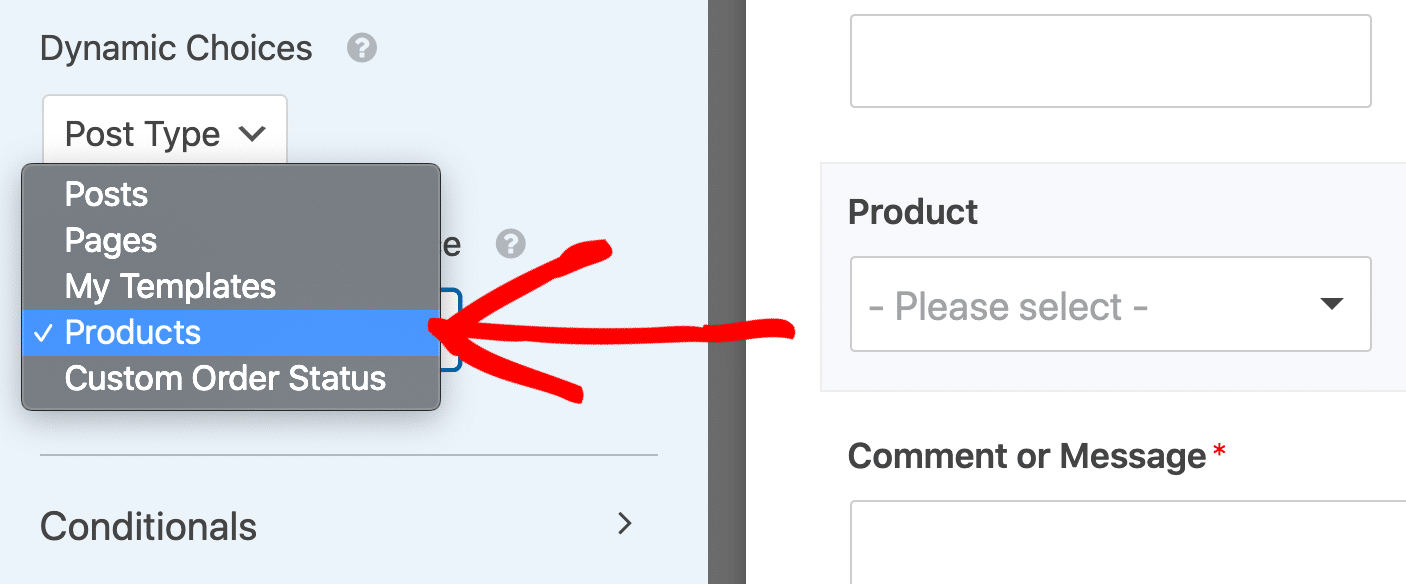
Post Type lets you auto-populate the field from a Dynamic Post Type Source. On a WooCommerce store, the choices in the second dropdown here might look like this:
- Post – A list of all of the blog posts on your site.
- Page – Lists all of the pages on your site.
- Products – A list of all of the products in your store.
These are all post types. You can use custom post types if you have any set up.
For example, we have a couple of other options to choose from here because we have 2 additional custom post types set up:
Let’s look at the other choice you can use to auto populate your form fields.
If you select the second option in the dropdown, Taxonomies, you’ll see a second dropdown called Dynamic Taxonomy Source.
The choices in the second dropdown will include options like:
- Tags – All of the tags associated with your blog posts.
- Categories – The categories associated with your blog posts.
- Product categories – Categories associated with your eCommerce products.
- Product tags – Tags you’ve added to your products.
- Product type – Product types or variants.
Again, your store will almost certainly have more options to choose from.
In this example, the store owner added a plugin to group products by brand, so that’s why we also have a Brands taxonomy we can use to auto populate our field.
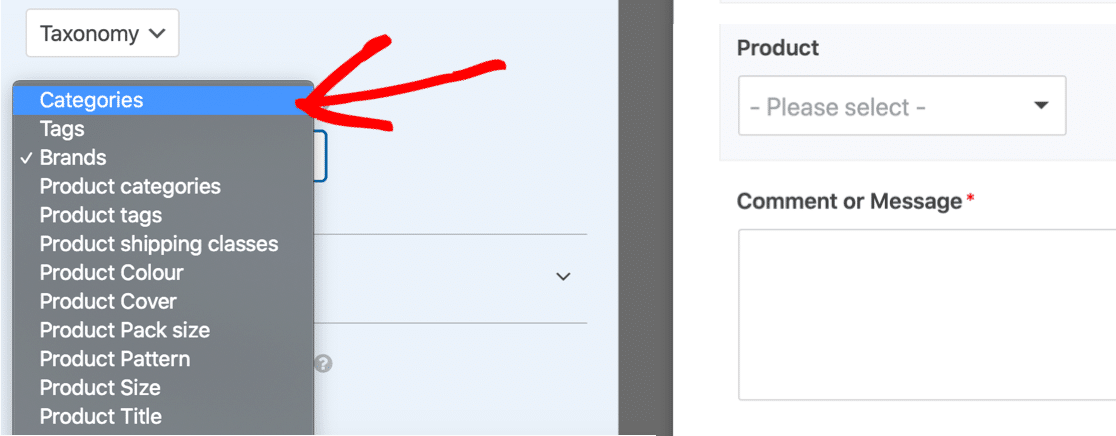
For this tutorial, we’re going to select Post Type and then Products. This will list all products in our store.
Sometimes auto-populated fields can have a lot of choices. If you want to exclude items from the dropdown, check out our guide to excluding items from auto-populated fields.
Finally, you’ll want to check your form’s general settings. Check out our guides on:
Click Save to save your form.
Step 3: Publish Your Form
You can publish your form in different ways: in a post, in a page, or in the sidebar. You can use a shortcode for this, but we recommend using the embed option instead.
Start by clicking Embed at the top of the form builder.
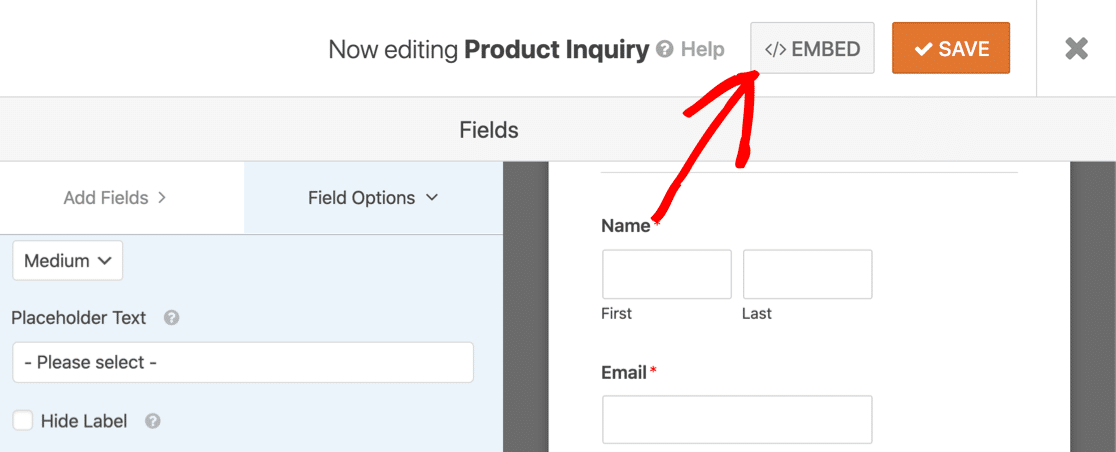
And then click Create New Page.

Type in a name for your page and click Let’s Go.

If everything looks OK here, just click Publish to go live.
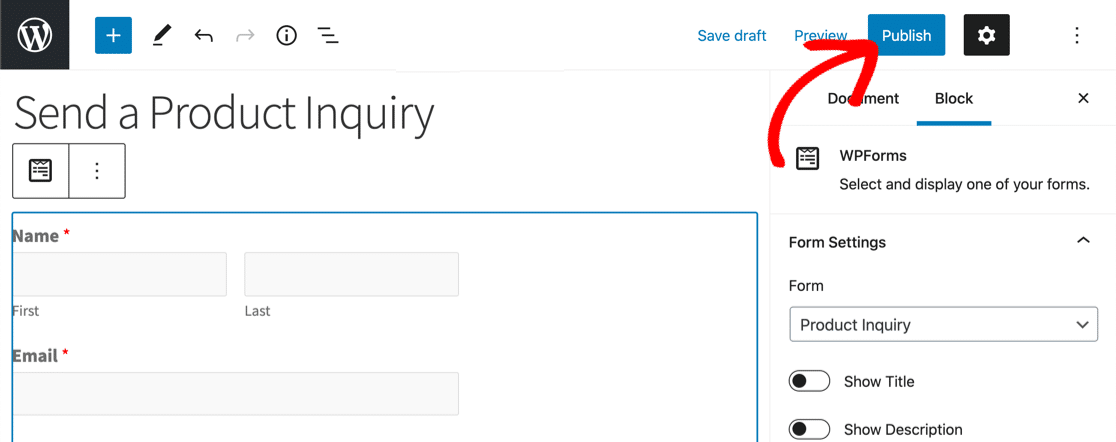
That’s it! Your form is ready for submissions.
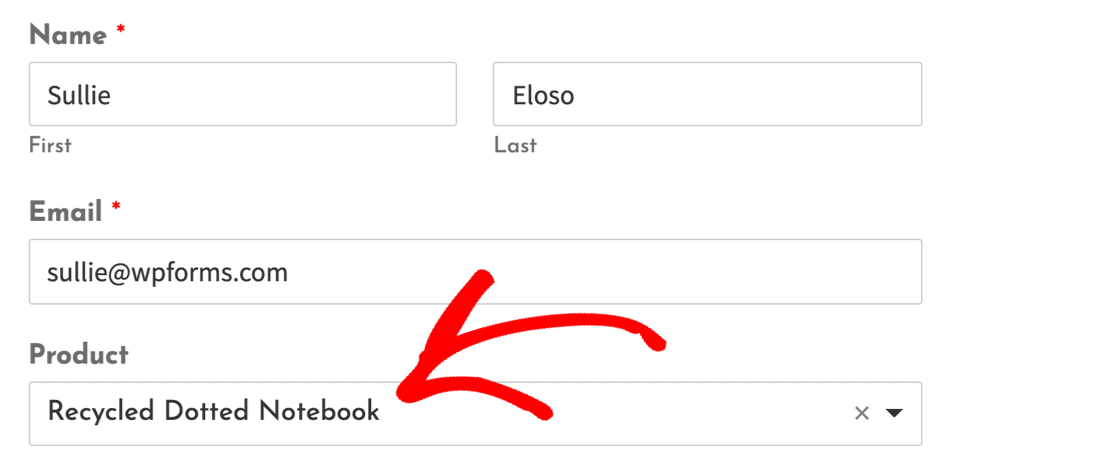
Now’s a great time to test out your dynamic field so you can start getting inquiries.
Create Your WordPress Form Now
FAQs on Auto-Populated Form Fields
We often receive questions about dynamic field choices and auto-populated fields. Here are a few we’re asked regularly.
What Is a Dynamic Field Choice?
A dynamic field choice is form response that’s automatically filled in for your visitor.
Instead of manually typing in each answer, you can have WPForms pull in all of the options automatically from custom post types or taxonomies on your site.
Dynamic choices are also known as auto-populated fields.
Why Add Auto-Populated Fields to a Form?
Auto-populated fields can help to:
- Reduce form abandonment – by pre-filling fields, you can make forms easier to fill in
- Improve accuracy – your visitor doesn’t have to type in the answers themselves
- Keep forms up to date – WPForms always shows the most recent items in the form field.
Maintaining your forms is easy because WPForms automatically pulls the list of options from your post types or taxonomies.
Which Fields Can Be Auto Populated?
In WPForms, you can use dynamic field choices to auto-populate 3 field types:
- Dropdowns
- Multiple choice fields
- Checkboxes
You can use the easy drag-and-drop builder to add them to your forms.
Why Are Auto-Populated Fields Useful?
Auto-populated form fields are perfect for:
- WooCommerce products on a customer support form
- Properties on a real estate inquiry form
- Job postings on a job application form
- Pets or specific breeds on a veterinarian intake form
- Services on a business contact form.
Create Your WordPress Form Now
Next, Make Smart Forms Quickly With WPForms
Auto-populating fields is a smart way to build complex forms quickly. If you’re looking to do more with your forms, here are some other ideas to try:
- Automatically fill in fields using query strings (Prefill by URL)
- Automatically fill in a coupon code from a link
- Use smart tags to automatically populate fields, make dynamic descriptions, and add pre-filled default choices.
Ready to build your form? Get started today with the easiest WordPress form builder plugin. WPForms Pro includes lots of free templates and offers a 14-day money-back guarantee.
If this article helped you out, please follow us on Facebook and Twitter for more free WordPress tutorials and guides.
